gpuix-svelte
Write desktop apps in Svelte and render them into a native, GPU-accelerated window.
gpuix-svelte is a Svelte custom renderer for GPUI, the UI framework behind
the Zed editor. It talks to GPUI through @gpuix/native.
Warning
Experimental. gpuix-svelte is built on Svelte's unreleased custom renderer API, so every release ships the exact Svelte build it was tested against (see About the Svelte version). Expect breaking changes between minor versions.
Quick start
npm create gpuix-svelte@latest my-app
cd my-app
npm install
npm start
A counter opens in its own window. Edit App.svelte, save, and the window hot-reloads.
You need Node.js 24 or later or Bun 1.4 or later, on macOS (Apple Silicon), Windows (x64
or arm64) or Linux (x64). The GPUI binary comes prebuilt from npm, so npm install is all the
setup there is. On Bun, run bun create gpuix-svelte my-app, then cd my-app, bun install and
bun run start. Building the app for distribution (npm run build: a .app on macOS, an .exe
on Windows, a binary on Linux) needs Bun even if you develop on Node; see
Shipping.
On Linux the binary loads libxcb, libxkbcommon and libxkbcommon-x11. Desktop installs have
them, a minimal container does not (apt install libxcb1 libxkbcommon0 libxkbcommon-x11-0), and a
machine without a GPU also needs a software Vulkan driver such as mesa-vulkan-drivers. Wayland
and X11 both work. GNOME under Wayland gives the window no title bar, so there render() draws a
simple one of its own (details).
What it looks like
<!-- App.svelte -->
<script lang="ts">
  let count = $state(0);
</script>

<div class="app">
  <text class="count">{count}</text>
  <div class="btn" onclick={() => count++}>Add one</div>
</div>

<style>
  .app { display: flex; flex-direction: column; align-items: center; gap: 16px; padding: 32px;
         width: 100%; height: 100%; background-color: #1e1e2e; }
  .count { font-size: 48px; color: #cdd6f4; }
  .btn { padding: 12px 24px; border-radius: 8px; background-color: #313244; color: #cdd6f4; }
  .btn:hover { background-color: #45475a; }
</style>
// app.ts
import { render_hot } from 'gpuix-svelte';

render_hot(new URL('./App.svelte', import.meta.url), { title: 'My app', width: 640, height: 480 });
npx gpuix-svelte app.ts          # Node
npx gpuix-svelte --bun app.ts    # Bun
Runes, snippets, {#each}, {#if}, {#await}, <svelte:boundary> and .svelte.ts state modules
all work. Scoped <style> blocks work for class rules (the styling page has
the details). GPUI paints the window on the GPU. Your app runs in Node or Bun, so it can read
files, spawn processes, open SQLite databases and load native addons directly.
Coming from Svelte on the web
- Elements are GPUI's:
div,text,img,svg,input,textarea,code,diff,markdown,virtual-listandanchored. Any other tag renders as adiv, with a one-time warning.<img src>takes a file path, adata:URL or an http(s) URL. - Styling is CSS, laid out with flexbox. Lengths are
pxorrem(16 px), and sizes (width,height,min-*,max-*) also take%andauto.<style>blocks take class rules with:hover,:activeand:focus-visible. Values GPUI can't use are dropped with a warning. → docs/styling.md - Theming is
var(--token)in your styles plus oneset_css_vars({ token: '#fff' })call. → docs/styling.md#theming-with-css-variables - Mouse events go to the element under the pointer. Put
hitbox="self"on a clickable element and clicks on its icons and badges reach it.onclickis the primary button; right and middle clicks areonauxclick. → docs/styling.md#what-works-and-what-does-not - Inputs report through events, with the value on the event:
<input value={text} onchange={(e) => (text = e.value)} />. There is nobind:, and{@attach}hands you the element. → docs/guide.md - Keyboard shortcuts go through
on_window_key('keydown', handler), which hears keys whatever has focus. → docs/guide.md Scroller,Portal,TooltipandPopovership with the package: a scroll column with a draggable scrollbar (virtualised on request), a wrapper that paints modals, menus and toasts on top from anywhere in the tree, and a hover tip and a controlled panel that hang beside their trigger. → docs/components.md- Window and desktop APIs cover the title, fullscreen, the file picker, file drops, images from raw pixels, focus and accessibility attributes. → docs/guide.md
Documentation
| Styling | Every CSS property and value GPUI understands, what is dropped, theming with variables |
| Components | Scroller (incl. virtualised lists), Portal, Tooltip, Popover, and the native <anchored> they build on |
| Guide | Forms, text search, keyboard and focus, reactive window size, the title bar on GNOME, window and desktop helpers, state that survives hot reload |
| Testing | Headless tests that click through GPUI's real hit testing, screenshots, and driving a running window |
| Shipping | Standalone binaries, signed macOS apps, and running in a browser via WebGPU |
| Updating | In-app updates from a static manifest, hash and signature checked, with a GitHub release workflow |
For real code, the examples are the best reference (see Examples).
Adding it to an existing project
npm install gpuix-svelte
gpuix-svelte brings its own Svelte, so it's the only runtime dependency you add (see About the
Svelte version). Run your entry through the package's bin, usually from
package.json:
{
  "type": "module",
  "scripts": {
    "start": "gpuix-svelte app.ts",
    "test": "gpuix-svelte test.ts"
  }
}
The bin starts Node, or Bun when you pass --bun or launch it with bun run. Before your entry
loads, it points svelte at the build with the custom renderer API and teaches the runtime to
import .svelte files. Your .ts files need nothing extra: Node and Bun run TypeScript
themselves.
Runtime flags go before the entry, and a flag that takes a value needs the = form
(gpuix-svelte --experimental-ffi app.ts, gpuix-svelte --import=tsx app.ts). Arguments after
the entry go to your script. Spelled out, the bin runs:
node --conditions custom-renderer --conditions development --import gpuix-svelte/register app.ts
bun  --conditions custom-renderer --conditions development --preload gpuix-svelte/plugin app.ts
The two --conditions flags matter: without them svelte resolves to its server build and
mount() does not exist. A bunfig.toml preload on its own is not enough for a plain bun file.ts
run, so go through the bin.
TypeScript
The package ships type declarations. Your tsconfig.json needs a paths entry that points at the
Svelte build nested inside the package. For the editor and svelte-check to type your markup as
GPUI elements, it also needs the gpuixHTML namespace:
{
  "compilerOptions": {
    "module": "nodenext",
    "strict": true,
    "noEmit": true,
    "allowImportingTsExtensions": true,
    "erasableSyntaxOnly": true,
    "verbatimModuleSyntax": true,
    "customConditions": ["custom-renderer", "development"],
    "types": ["node", "gpuix-svelte/html"],
    "skipLibCheck": true,
    "paths": {
      "svelte": ["./node_modules/gpuix-svelte/node_modules/svelte"],
      "svelte/*": ["./node_modules/gpuix-svelte/node_modules/svelte/*"]
    }
  },
  "svelteOptions": { "namespace": "gpuixHTML" }
}
That config needs typescript, @types/node and svelte-check as dev dependencies. You'll also
want a *.svelte module declaration and a svelte.config.js that turns off Svelte's DOM
accessibility advice. starter/ has all of it, ready to copy.
Node runs TypeScript by stripping the types, which rules out enums, namespaces, parameter
properties, a type imported without import type, and a relative import without a file
extension. Bun transpiles and accepts all of those, but the config above makes tsc flag them so
the app runs on both. If your app needs that syntax on Node anyway, install tsx and load it through
the bin: gpuix-svelte --import=tsx app.ts.
Event handlers take a GpuixEvent and {@attach} gets a ShadowNode. Both are exported as types:
<script lang="ts">
  import type { GpuixEvent, ShadowNode } from 'gpuix-svelte';
</script>
Examples
Every example under examples/ is an ordinary app: its .svelte components and a
main.ts that calls render_hot, so any of them drops into a project made with
npm create gpuix-svelte (liquid-glass-ffi also needs the liquid-glass component beside it).
The scripts below run them in a clone of the repository (bun install, then the command):
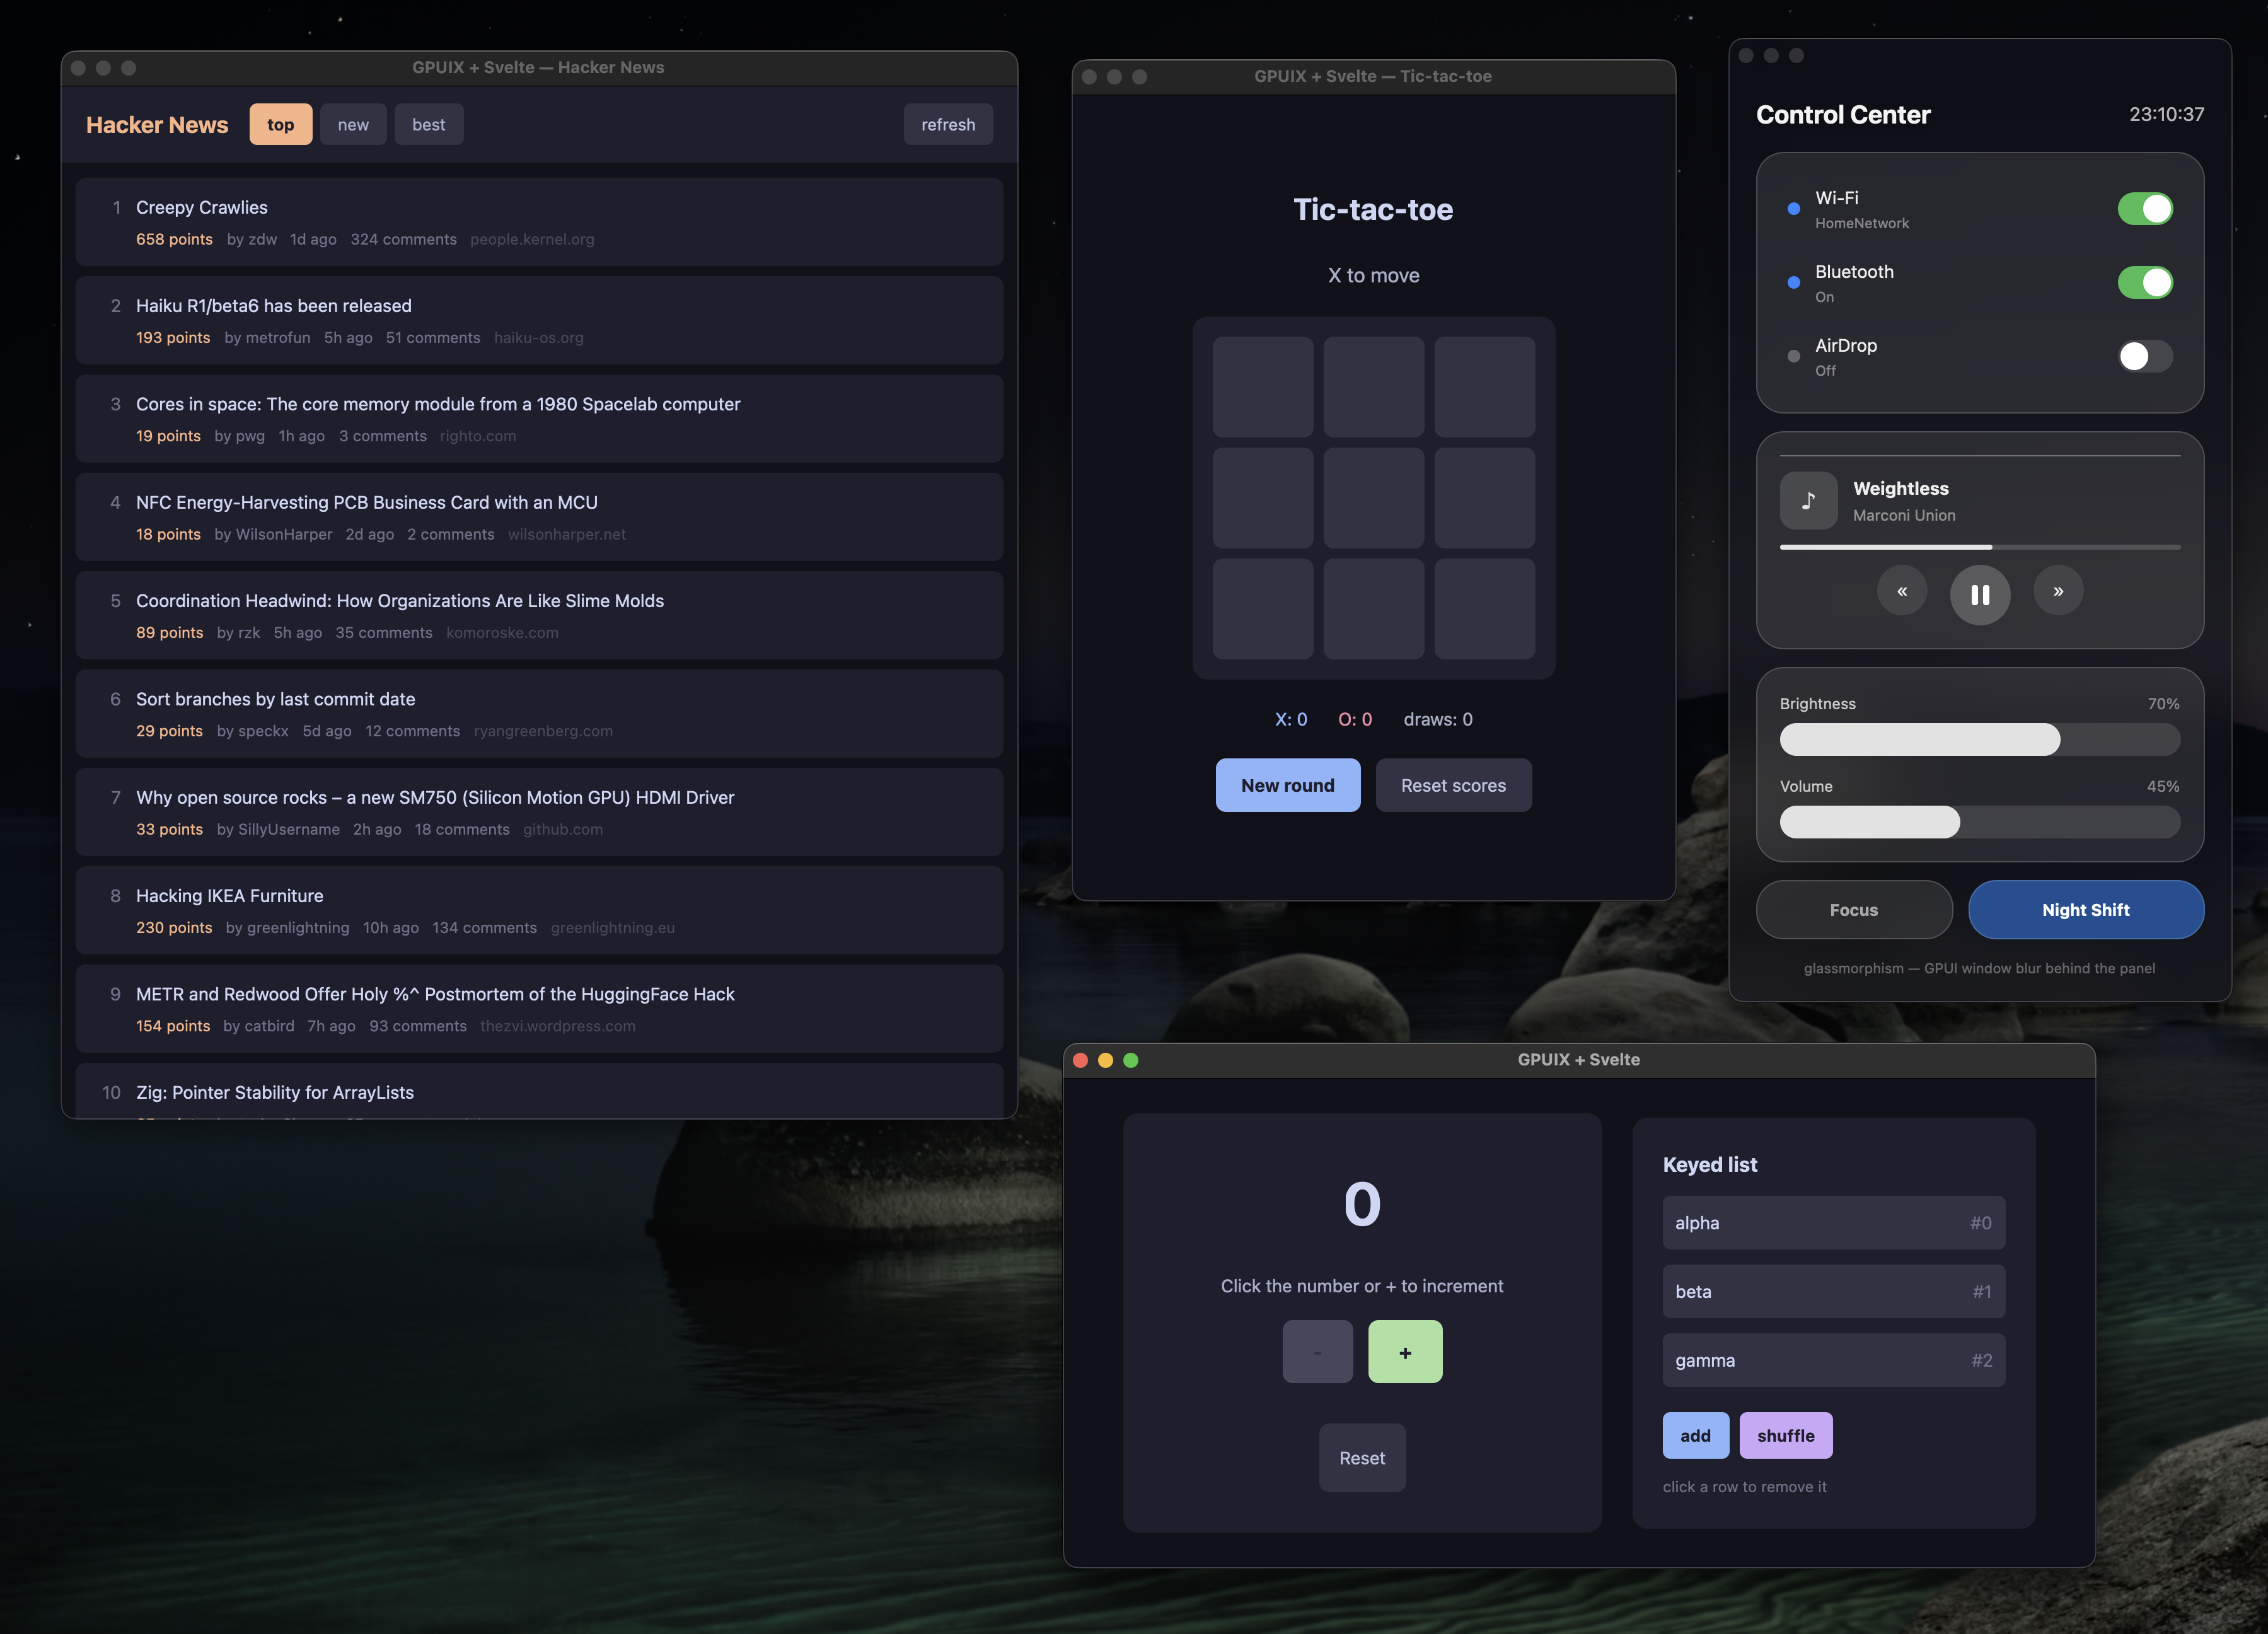
npm run demo:counter |
The counter, hot-reloading on save |
npm run demo:tictactoe |
Tic-tac-toe with score tracking |
npm run demo:hn |
Hacker News reader: live network data in a scrolling list |
npm run demo:glass |
A translucent control center over macOS vibrancy (demo:glass-ffi: NSGlassEffectView via FFI, macOS 26 and Node 26.1 or later) |
npm run demo:styling |
Which CSS reaches GPUI and which is dropped, side by side |
npm run demo:desktop |
Window controls, file picker and drops, live image pixels, selection, focus, accessibility |
npm run demo:native-0.11 |
What @gpuix/native 0.11 added: keyboard focus styles and dimming, Tab, layout and scroll events, new styles, fonts |
npm run demo:web |
Tic-tac-toe in a browser on GPUI's WebAssembly build (Bun) |
npm run tutorial |
A 12-step interactive guide to the renderer, itself a gpuix-svelte app |
Each of these, apart from demo:web (which always runs on Bun), has a Bun twin under a bun:
prefix, such as npm run bun:demo:counter.
About the Svelte version
The custom renderer API is still an open Svelte pull request. Each release of this package
bundles the exact build of that pull request it was tested against, inside
node_modules/gpuix-svelte/node_modules/svelte, and every svelte import, yours included,
resolves to that copy.
In practice:
gpuix-svelteis your one dependency, and the Svelte you import is the one it brings. Keepsvelteitself out of yourpackage.json.- Upgrading
gpuix-sveltecan change the Svelte build underneath you, so read the changelog before a minor bump. svelte-checkinstalls the registry's Svelte as its own peer dependency and uses it to read your components. Thepathsentry in your tsconfig points type imports at the bundled build.
Good to know
- A draggable scrollbar comes from
Scroller.scrollbar-colormakes GPUI paint its own thumb, but that one can't be dragged. - Context menus are drawn by the app: a
Popoverwithposition, or a<Portal>, placed at theonauxclickcoordinates. On macOS, ctrl+click arrives asonclickwithe.modifiers.ctrl, so handle both. left,top,rightandbottomtake pixels only. A progress bar's fill sizes withwidth: 50%.<svg>inheritscolorfrom its nearest ancestor, but not that ancestor's:hovercolour.- Headless tests run on macOS and Windows. On Linux, drive a real window instead (see Testing).
- Standalone binaries are built with Bun through
build()fromgpuix-svelte/build, which a scaffolded app already calls from itsbuild.ts. Web bundles start from the repository'sscripts/web.ts. See docs/shipping.md.
How it works
Svelte's custom renderer API hands the renderer DOM-shaped operations: create an element, insert it before an anchor, set an attribute, add a comment node. GPUI's tree is flat, keyed by numeric id, and holds elements and text. gpuix-svelte keeps a lightweight shadow tree in JavaScript and projects it onto GPUI. Only elements and non-blank text get native nodes, and they're created lazily, once they're attached to the window. Every change in a frame is queued and shipped as one batch before the next paint.
Around that sit a .svelte loader for Node and one for Bun, which compile components with the
renderer baked in and turn <style> blocks into class rules, a translator from CSS to GPUI
styles that expands shorthands and drops what GPUI would reject, a ~125 fps frame loop, and
in-process hot reload. The full design notes are in CLAUDE.md.
Contributing
See docs/contributing.md for running the demos and tests, moving the vendored Svelte build, and how releases are cut.
License
MIT